Overview
This document provides a guide for completing the End of Day process and viewing history. Follow these steps when accessing the End of Day and View History for the first time.
Prerequisites
- Access to the End of Day and View History features.
Steps
End of Day Process
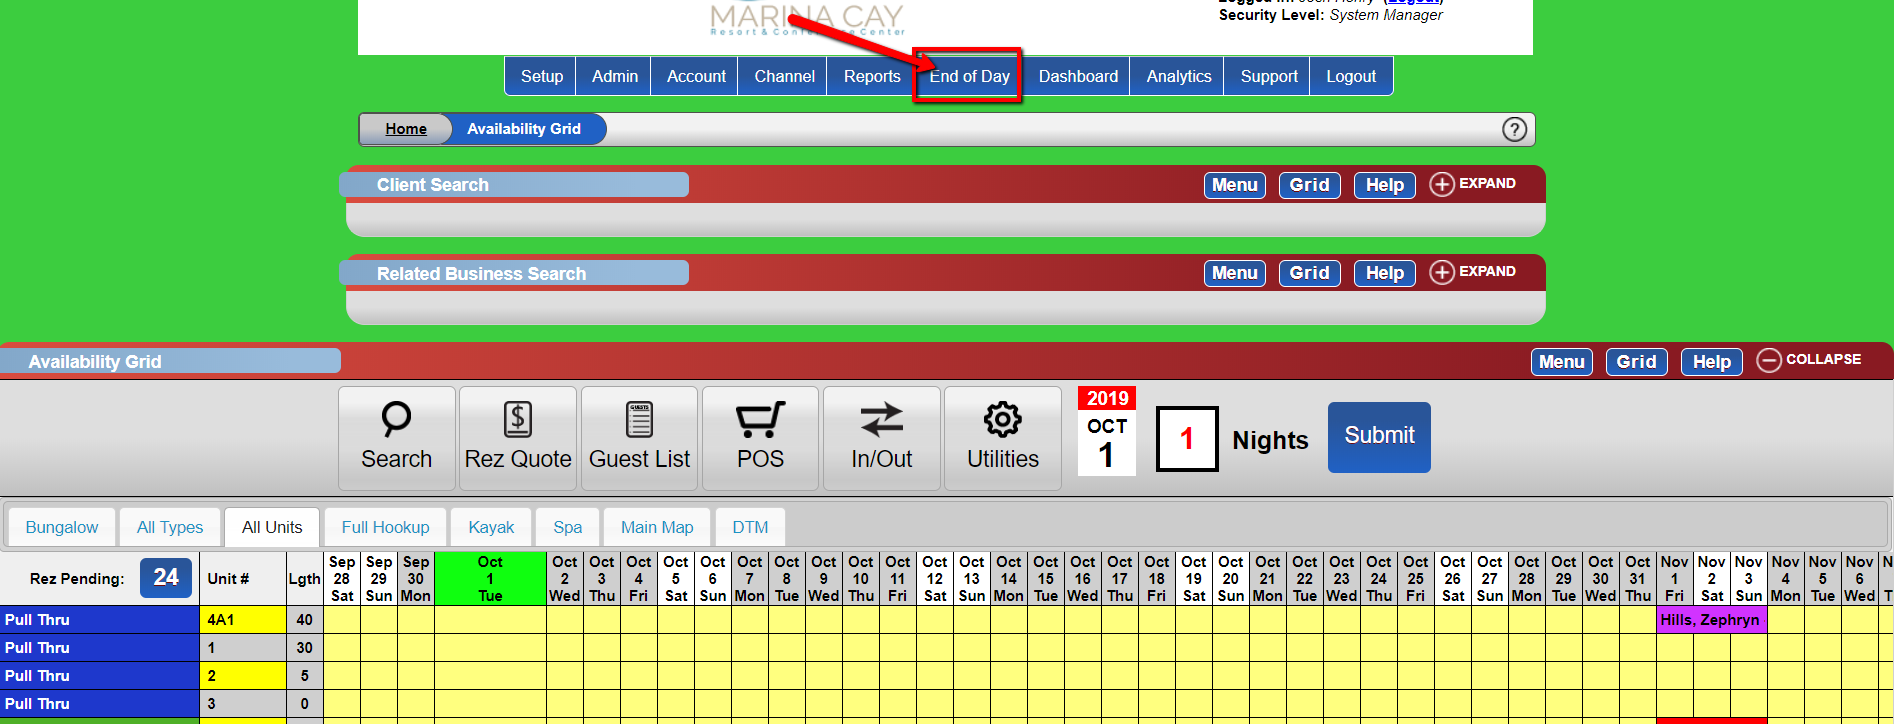
- Select ‘End of Day’
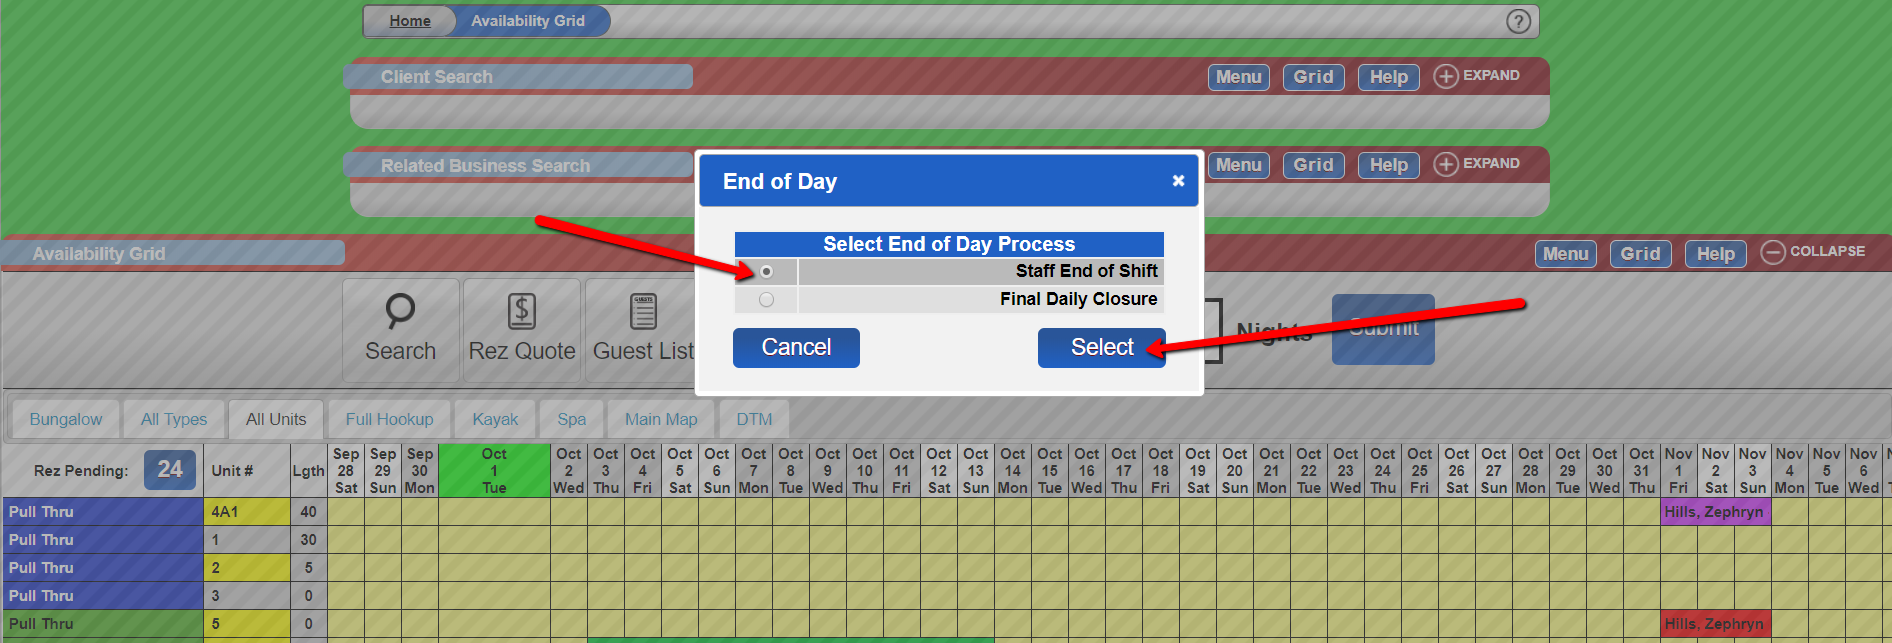
- Select ‘Staff End of Shift’
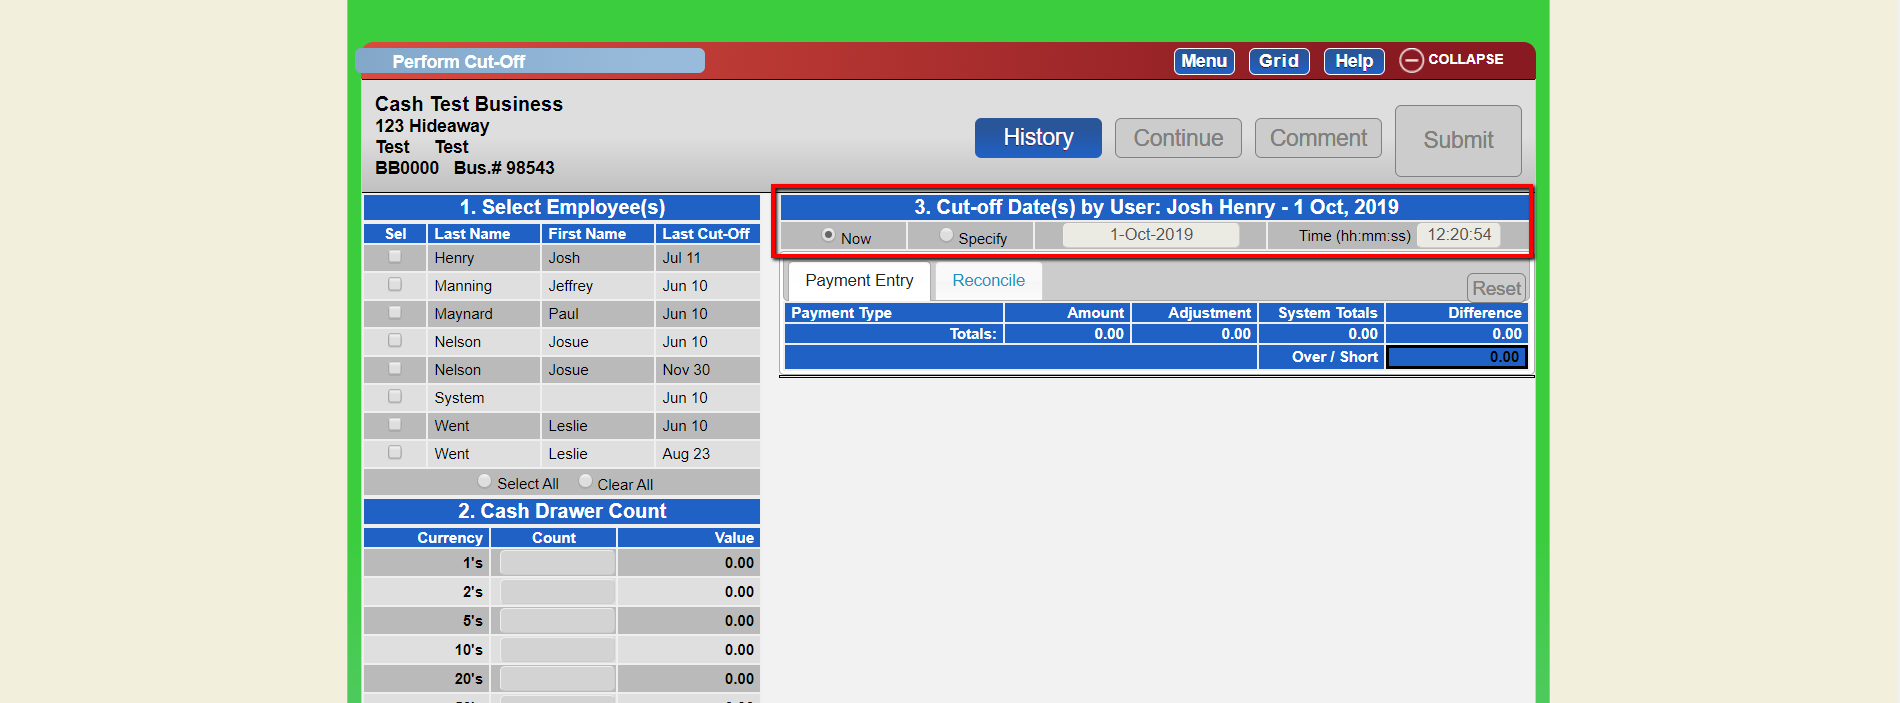
- Select the Time Period
- Choose ‘Now’ or ‘Specify’. If ‘Specify’ is selected, pick the desired time and date.
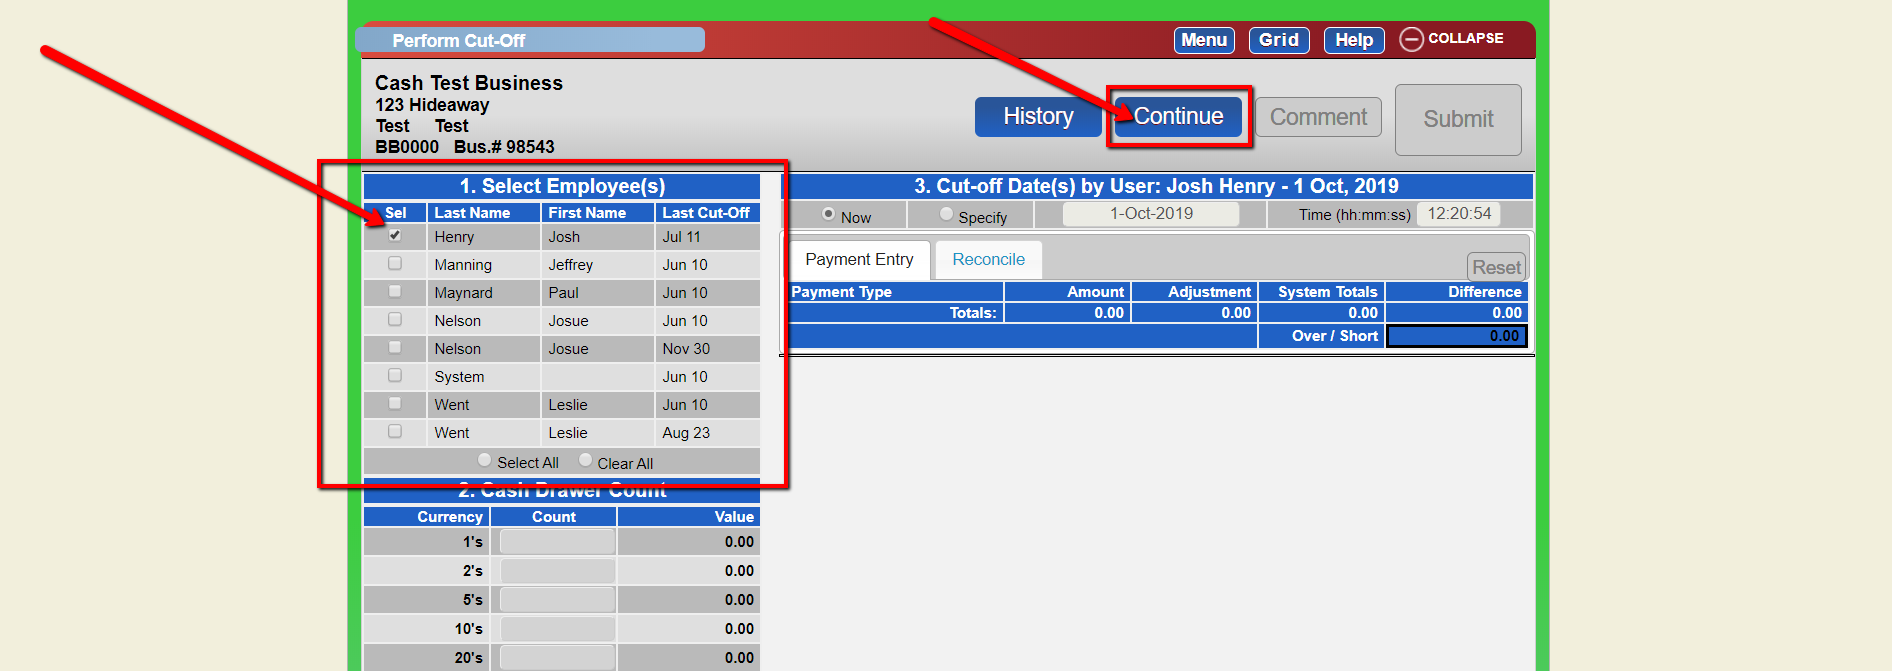
- Select Employees for the Report
- Click continue after selection.
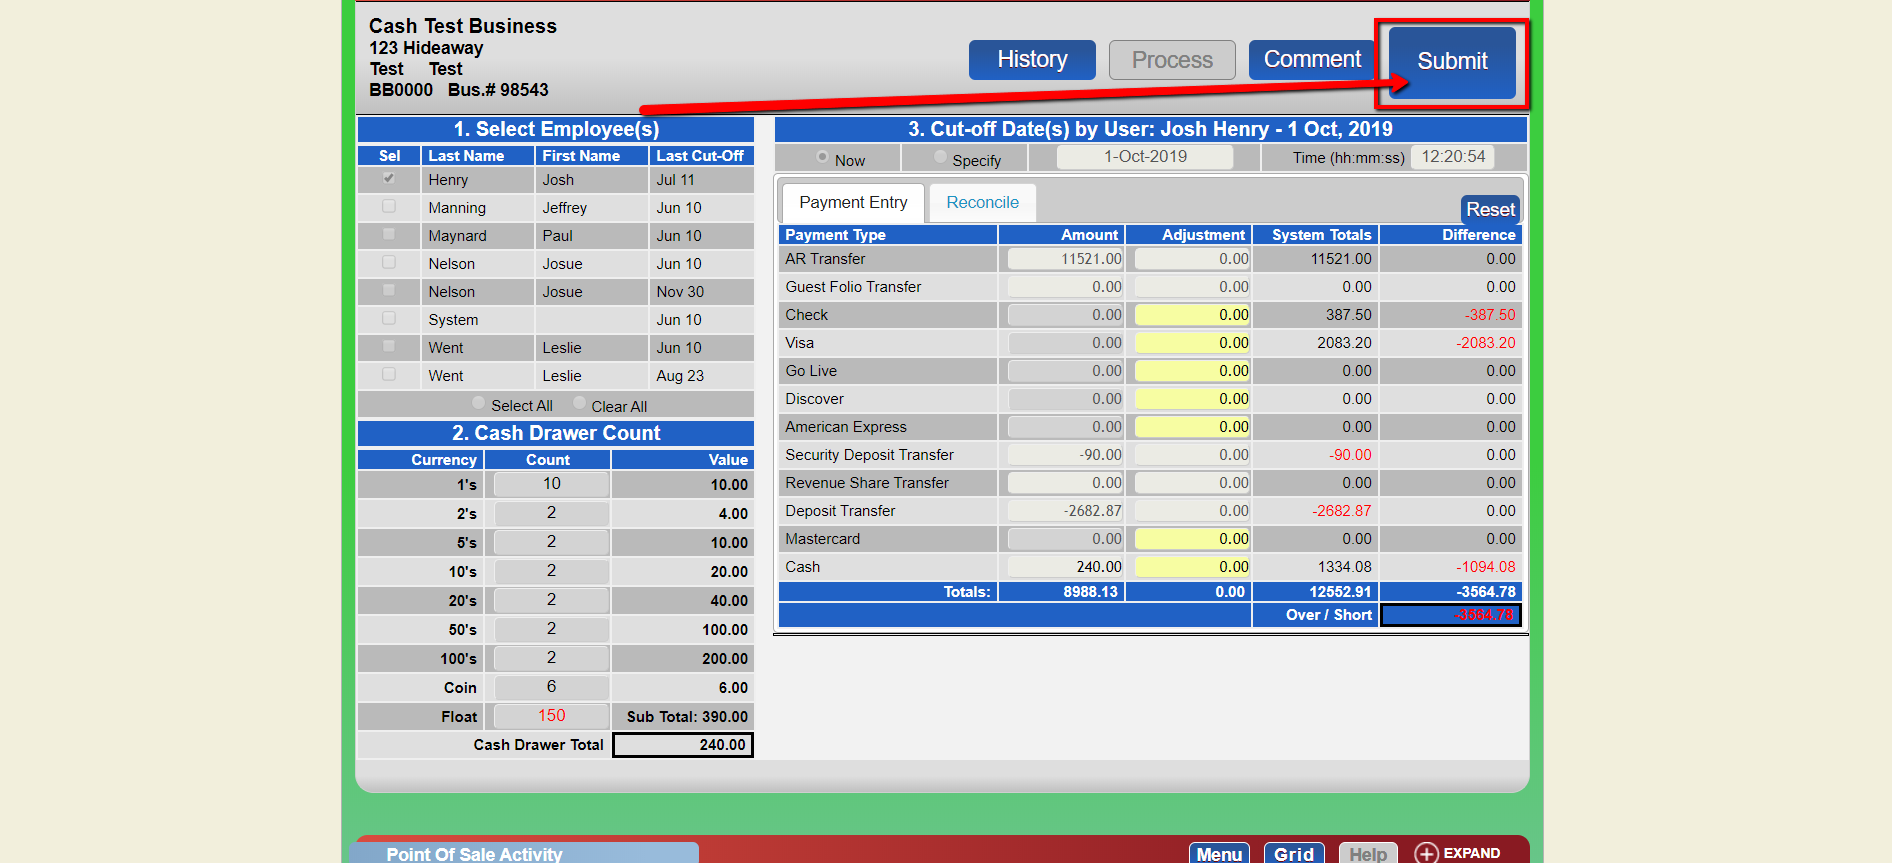
- Cash Drawer Count
- Input the monetary values of the day.
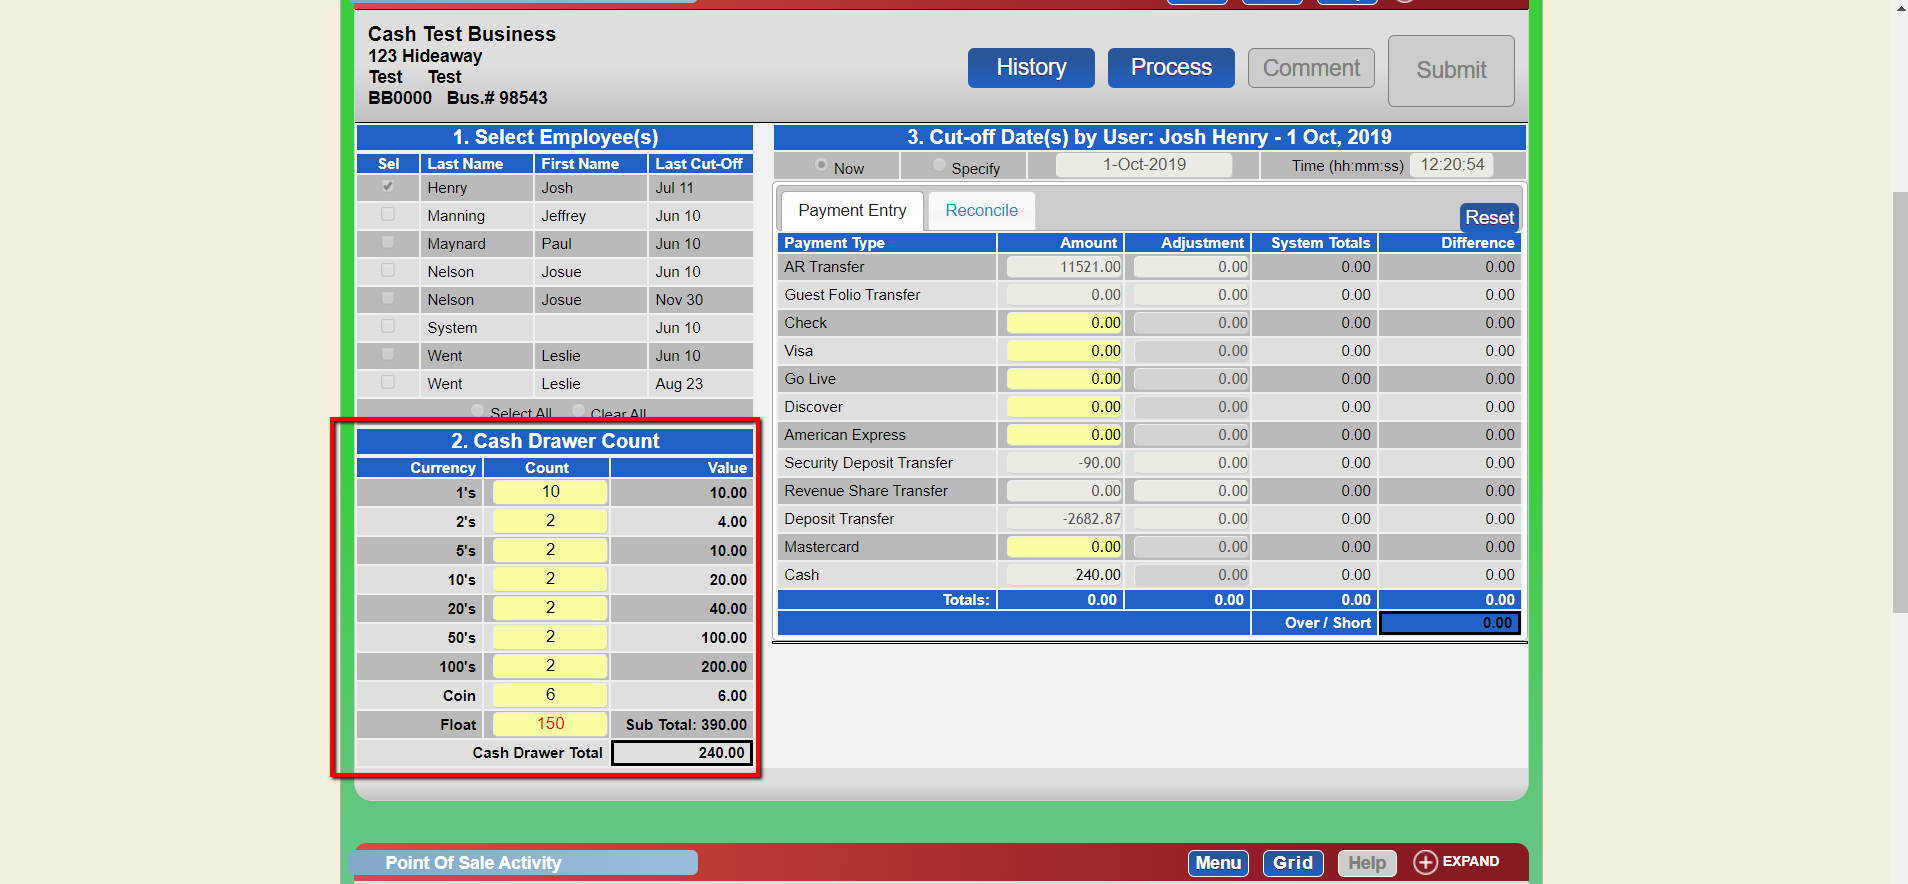
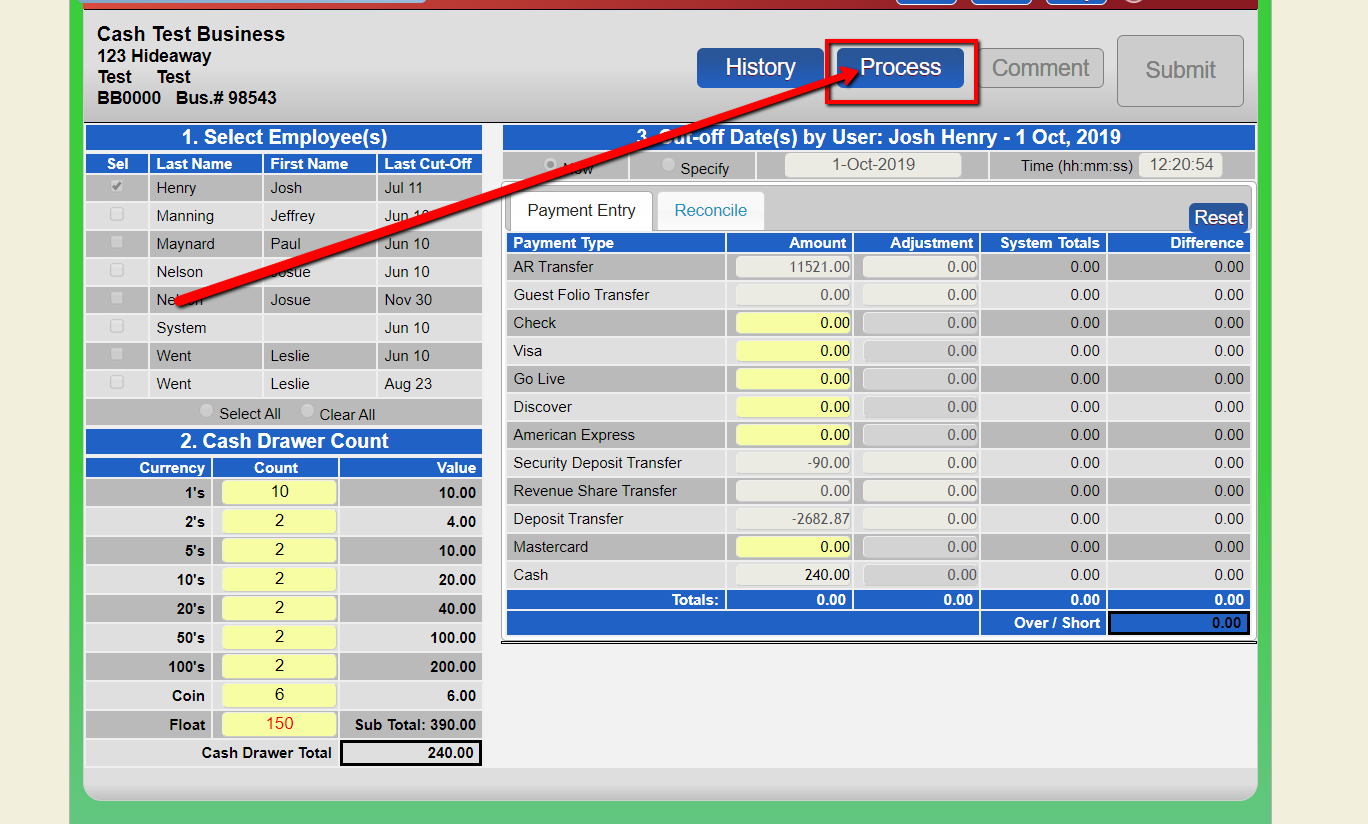
- Process and Confirm
- Click Process and confirm to continue.
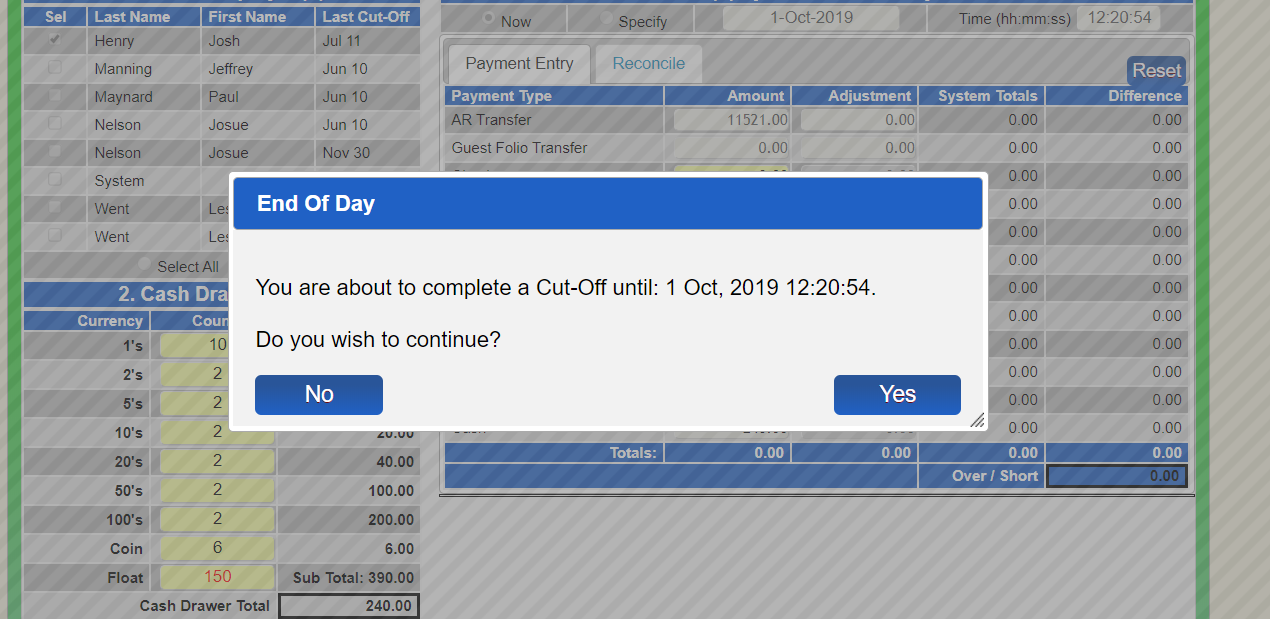
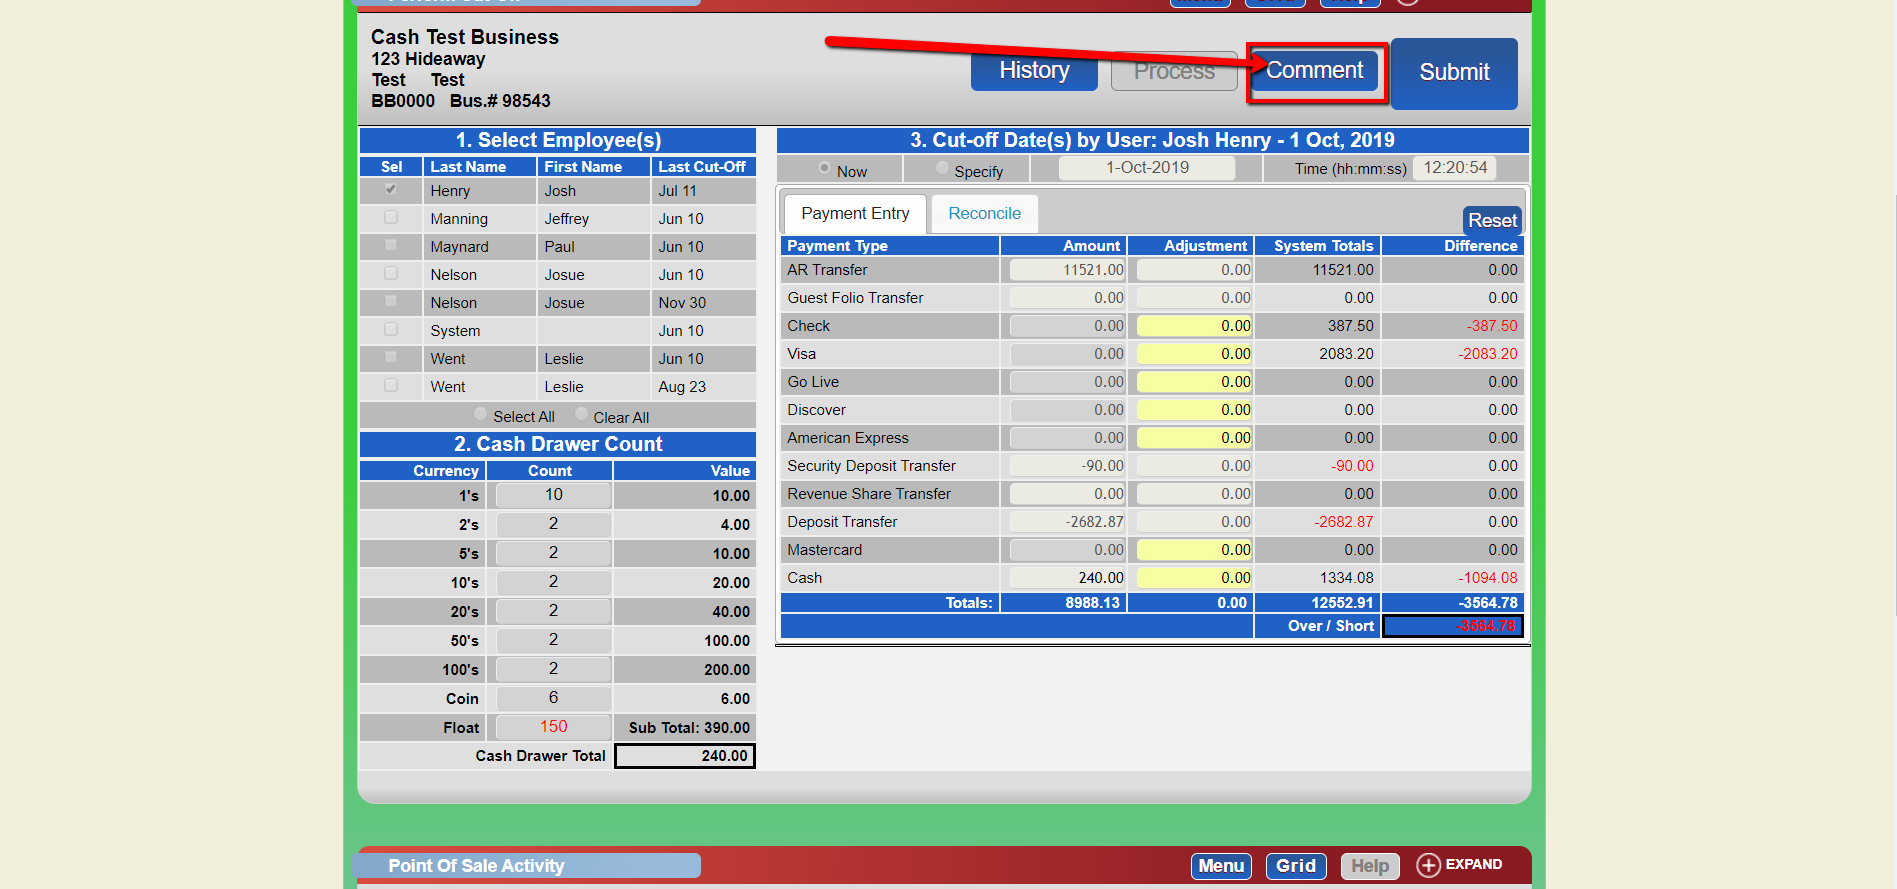
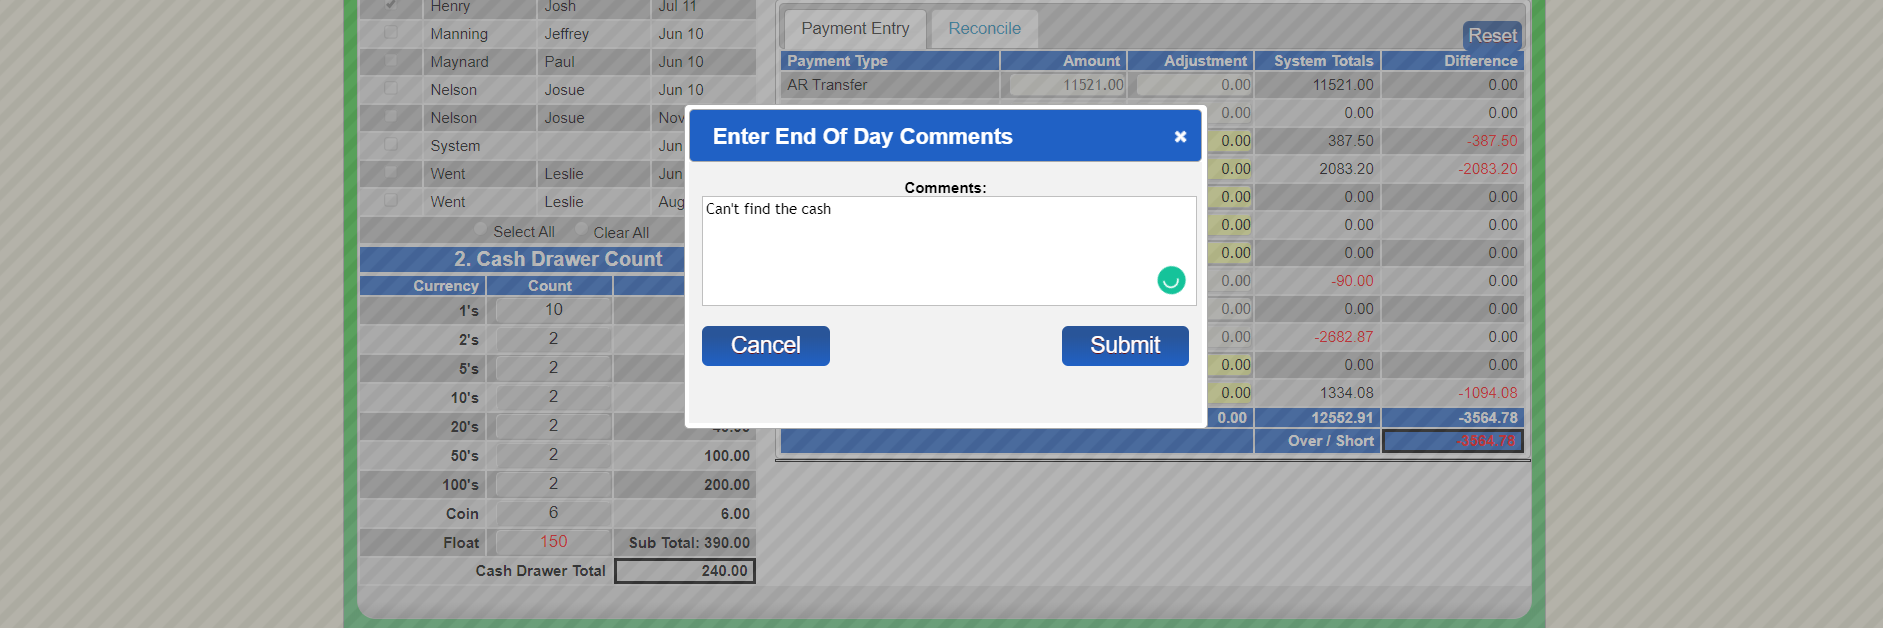
- Handle Short/Over Balances
- Add a comment if short or over; balance should be 0.00.
- Submit and Complete
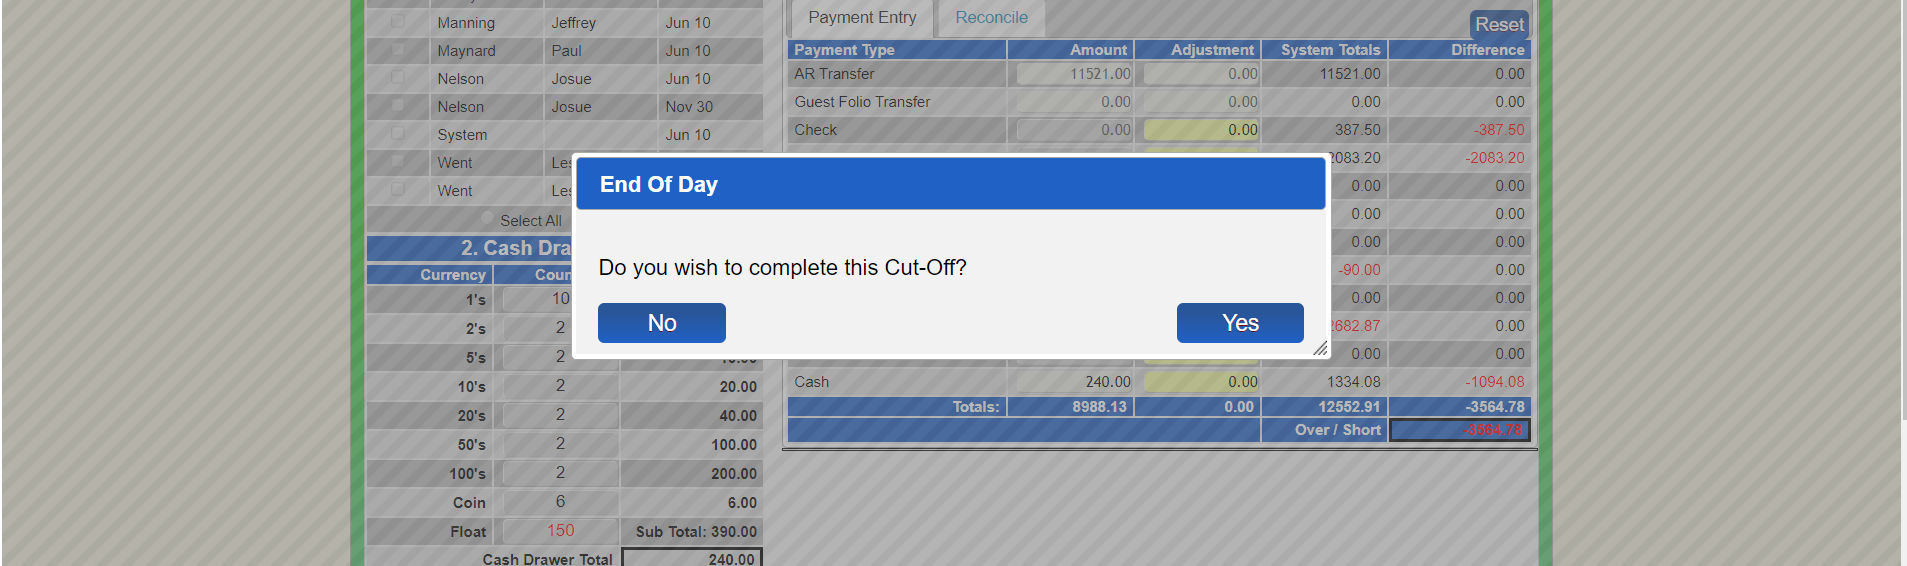
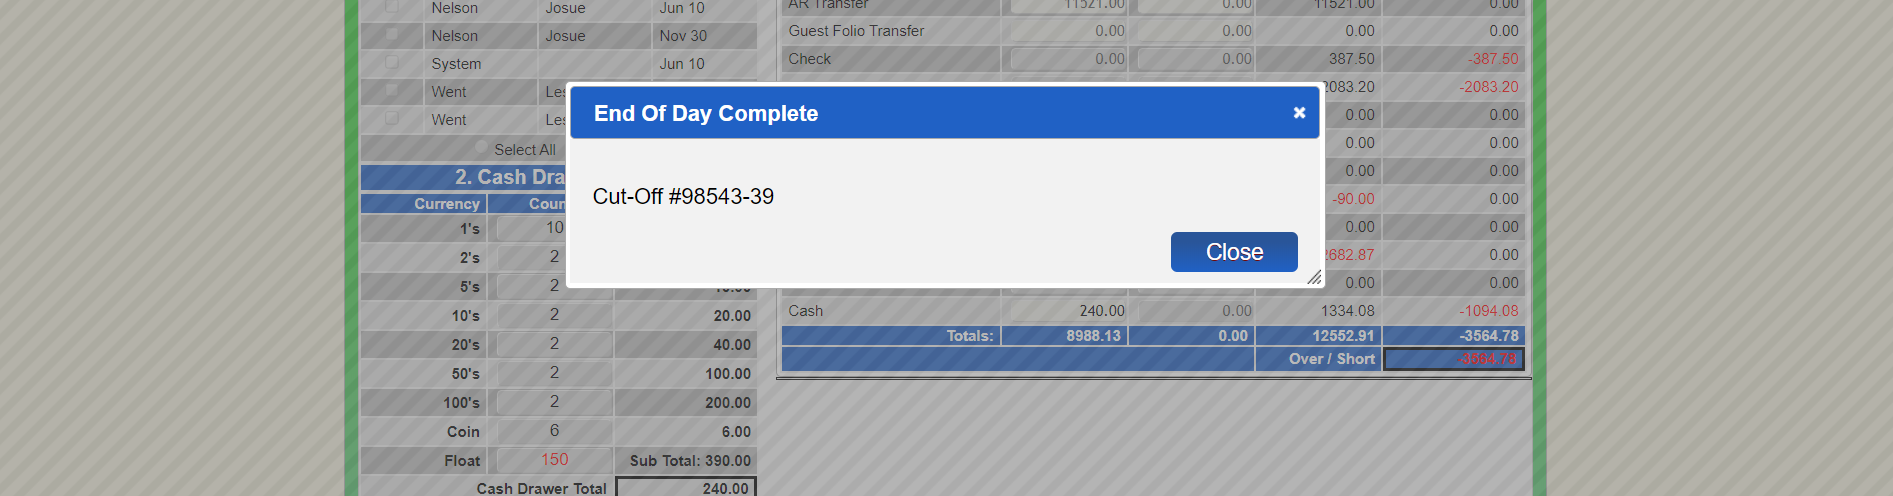
- Click Submit, confirm completion, and close the 'End of Day Complete' panel.
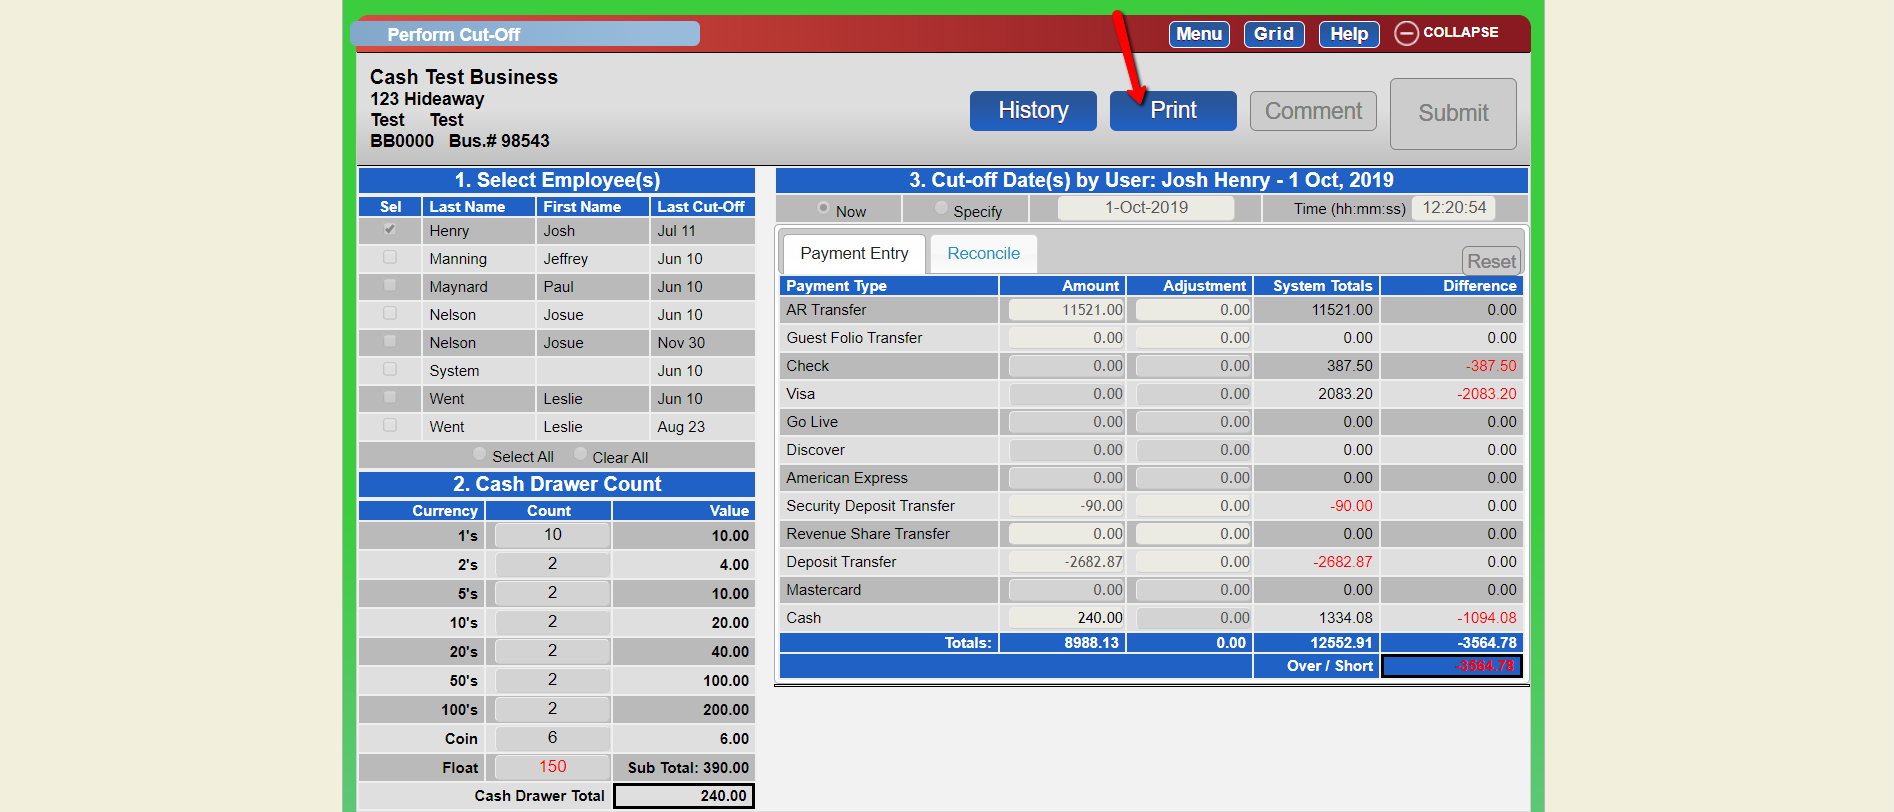
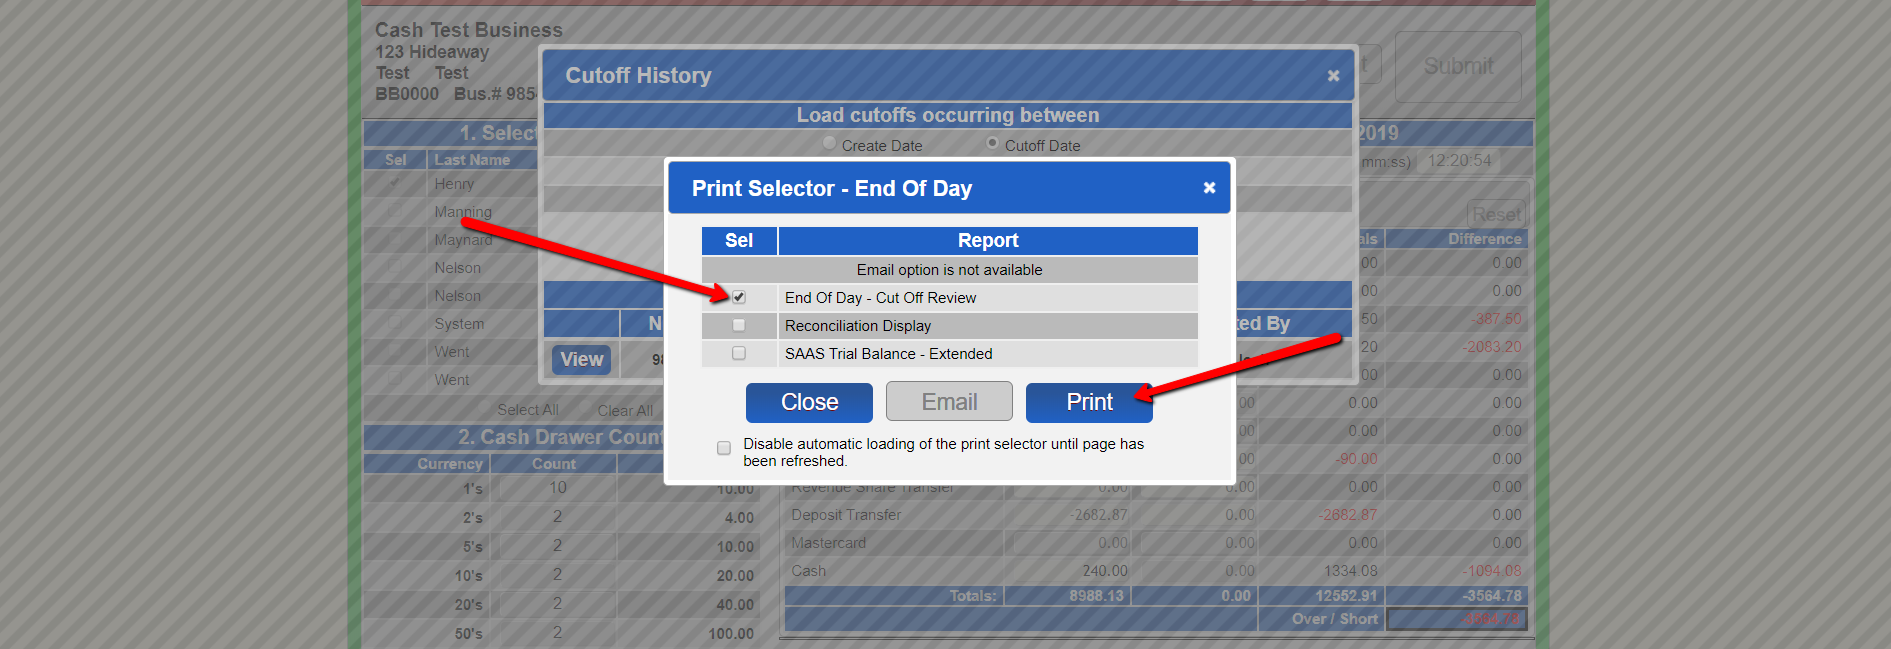
- Print Report
- Click Print to view the report.
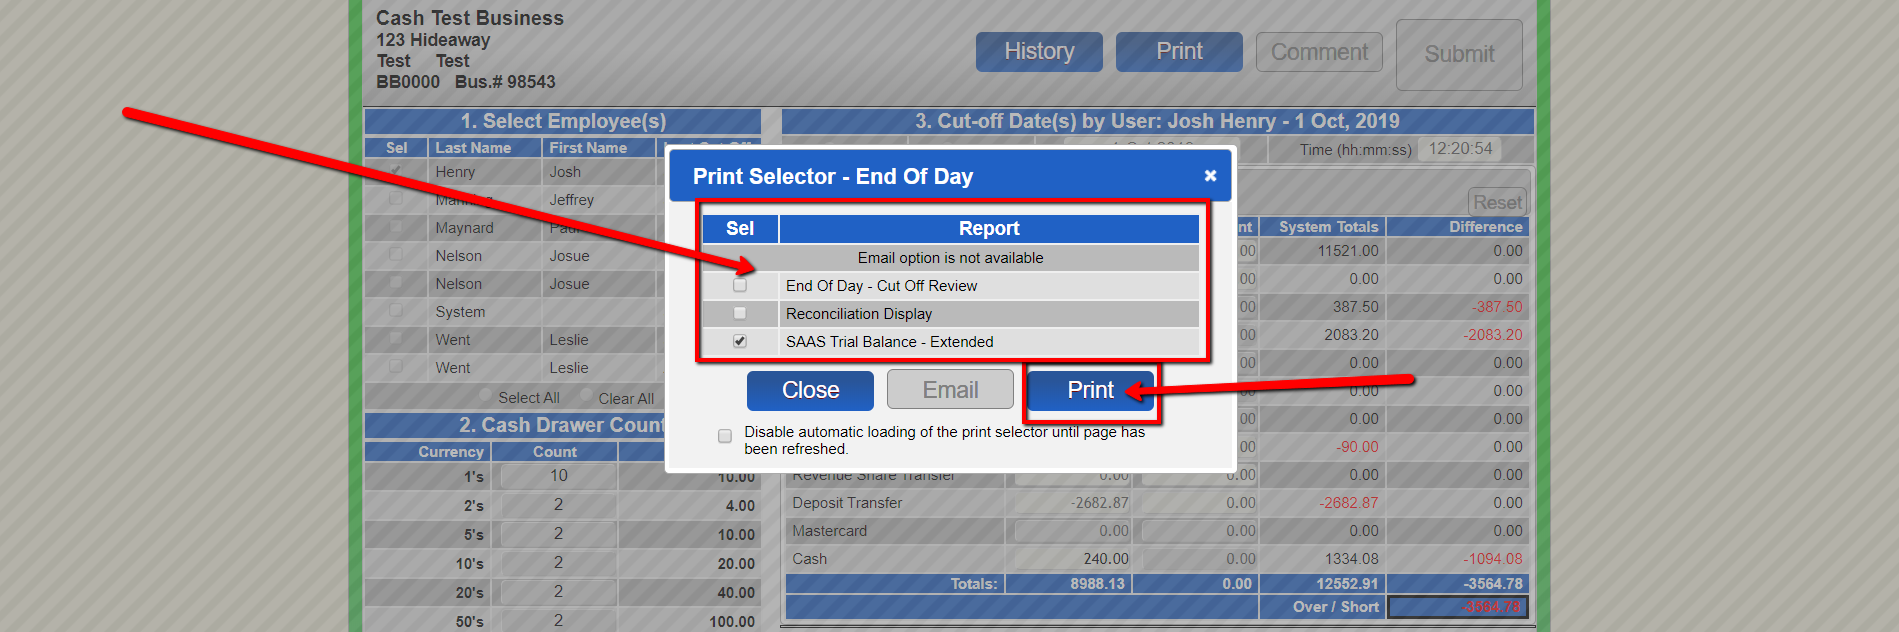
- Choose the report to view/print and click 'print'.
View History
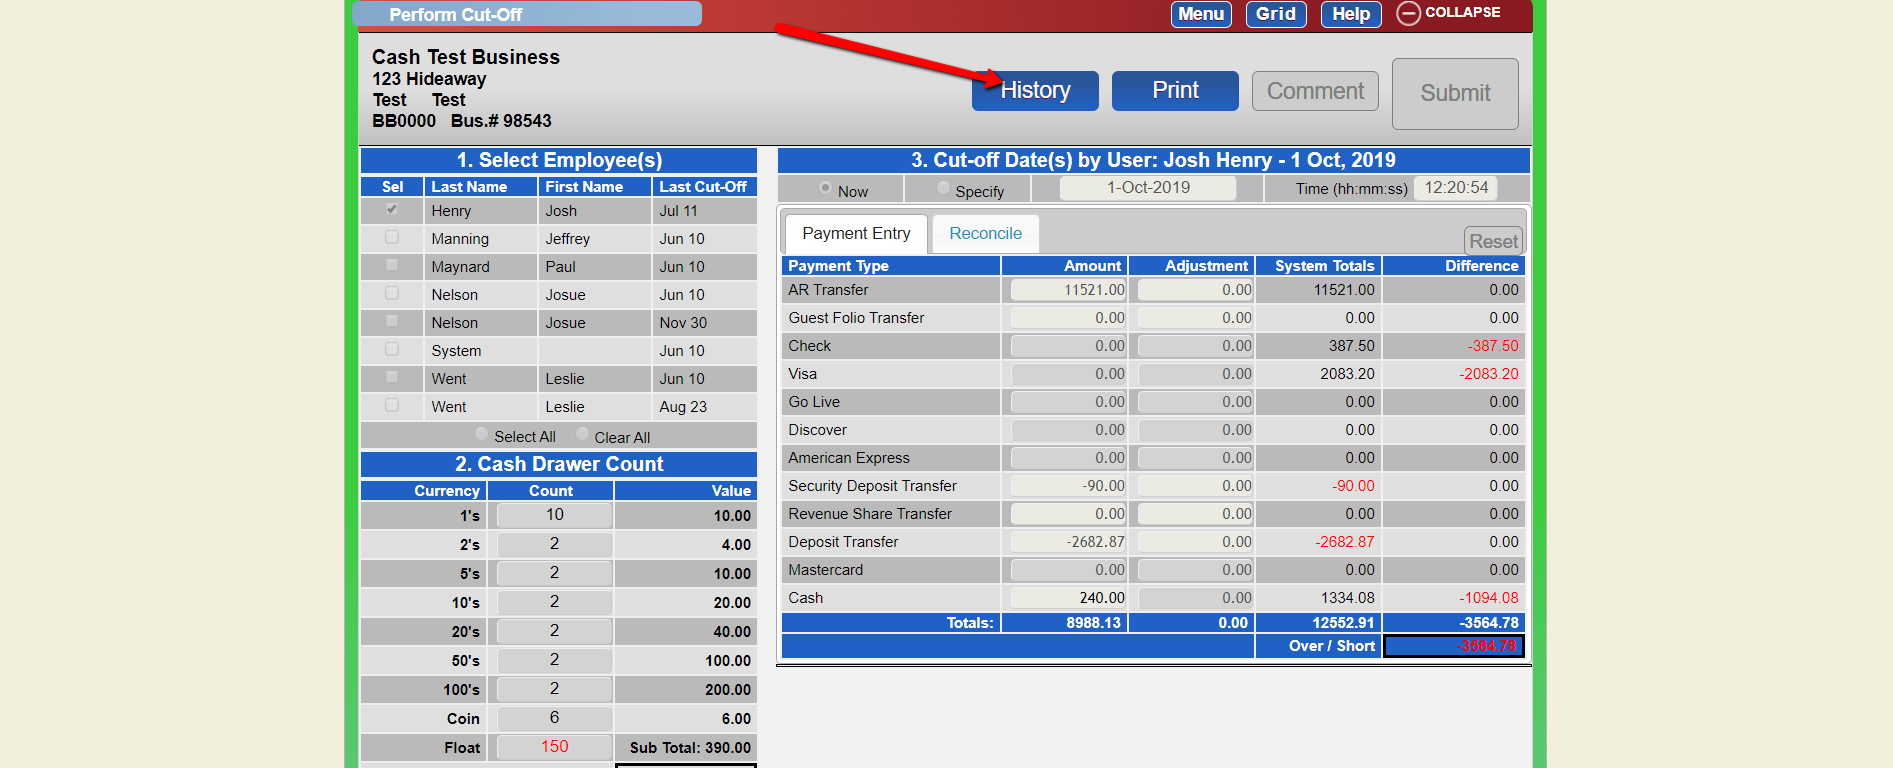
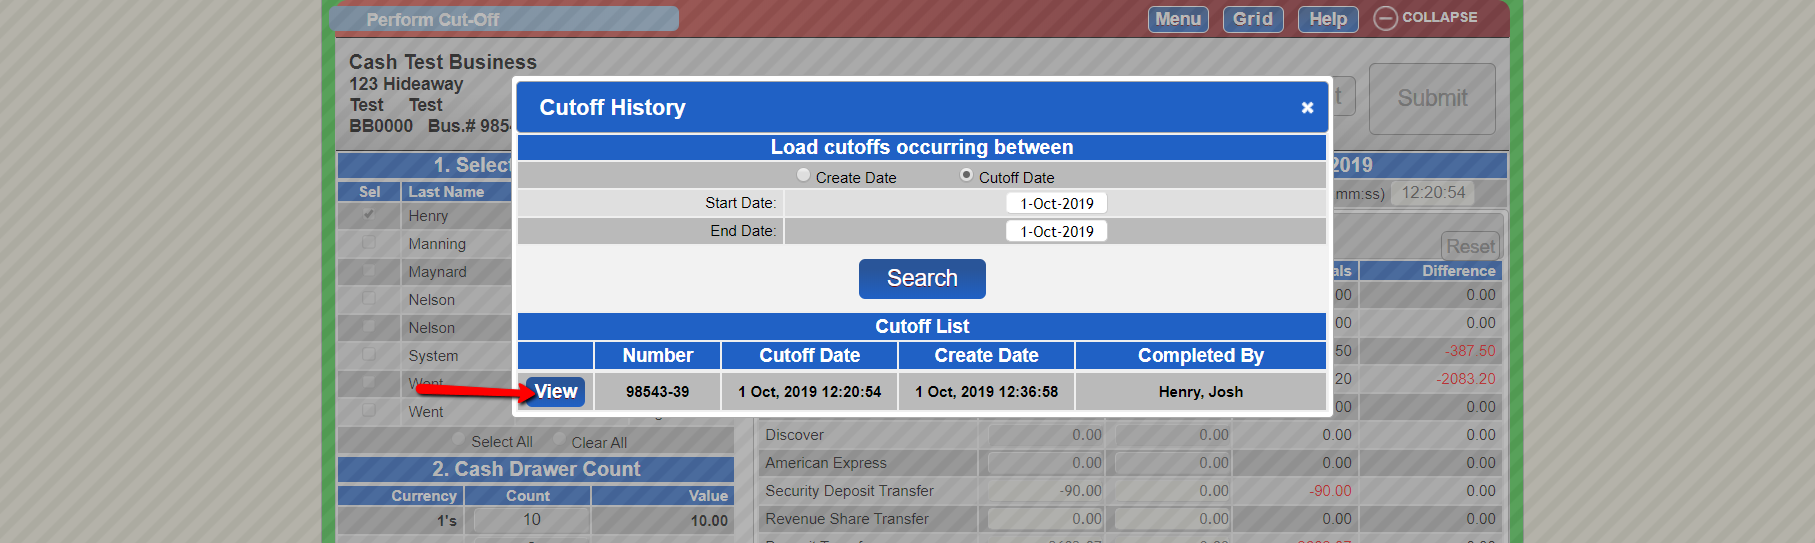
- Search for a Cutoff
- Click ‘History’.
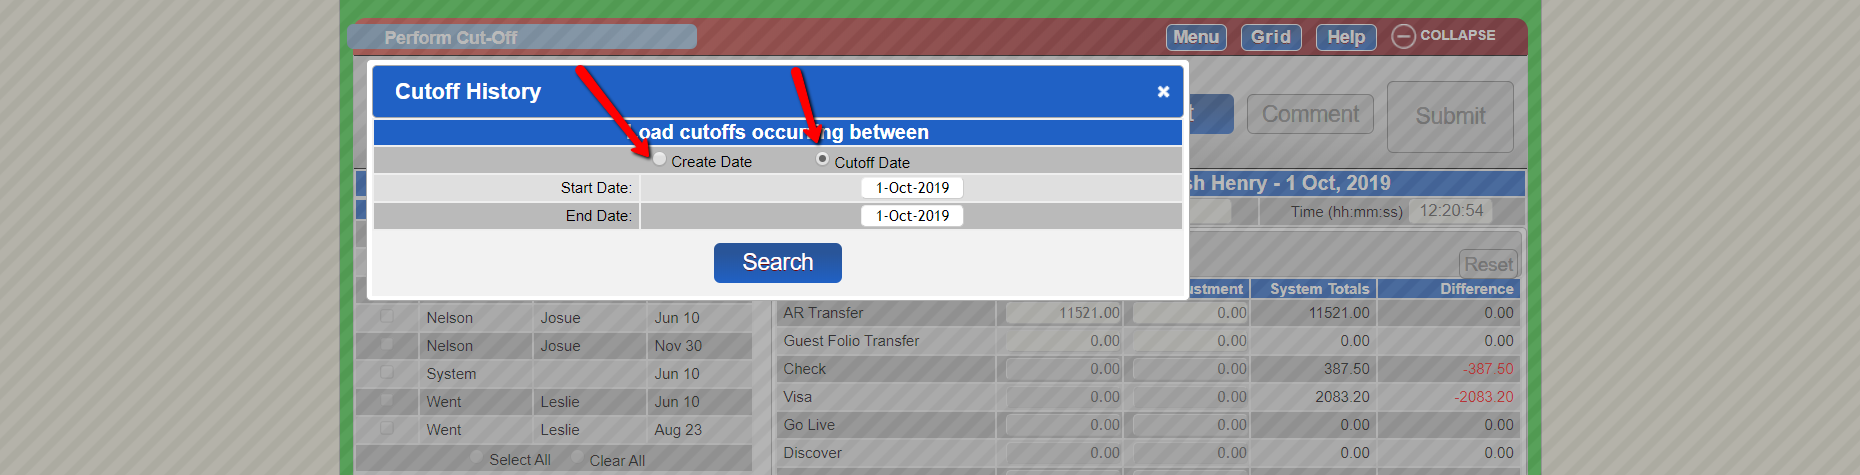
- Search Options
- Choose to search by 'create date' or 'cutoff date', select date range, and search.
- View and Print
- Click 'view' to open the print selector.
- Choose the report to print and click the 'Print' button.
Troubleshooting
- Ensure all steps are followed in sequence.
- Verify all inputs, especially monetary values, are correct.
- If encountering issues with balance, ensure comments are added for discrepancies.