Overview
The Closed Dates button in Inventory Setup is a useful tool for indicating dates of the year when a selected unit is closed.
For example, you can specify that Unit #1 is closed on Mondays and Wednesdays, or from March 1st to May 1st.
This feature eliminates the need to manually adjust schedules or enter inventory overrides to mark units as unavailable.
Steps
Navigate to Inventory Setup:
- Click on the Menu button.
- Select the Setup tab.
- Click on Inventory Setup
- Click on the Unit tab on the top left.
Select a Unit:
- Click on the Unit Type label to expand out the Unit listing.
- Click on the required Unit.
- Click on the Closed Dates box.
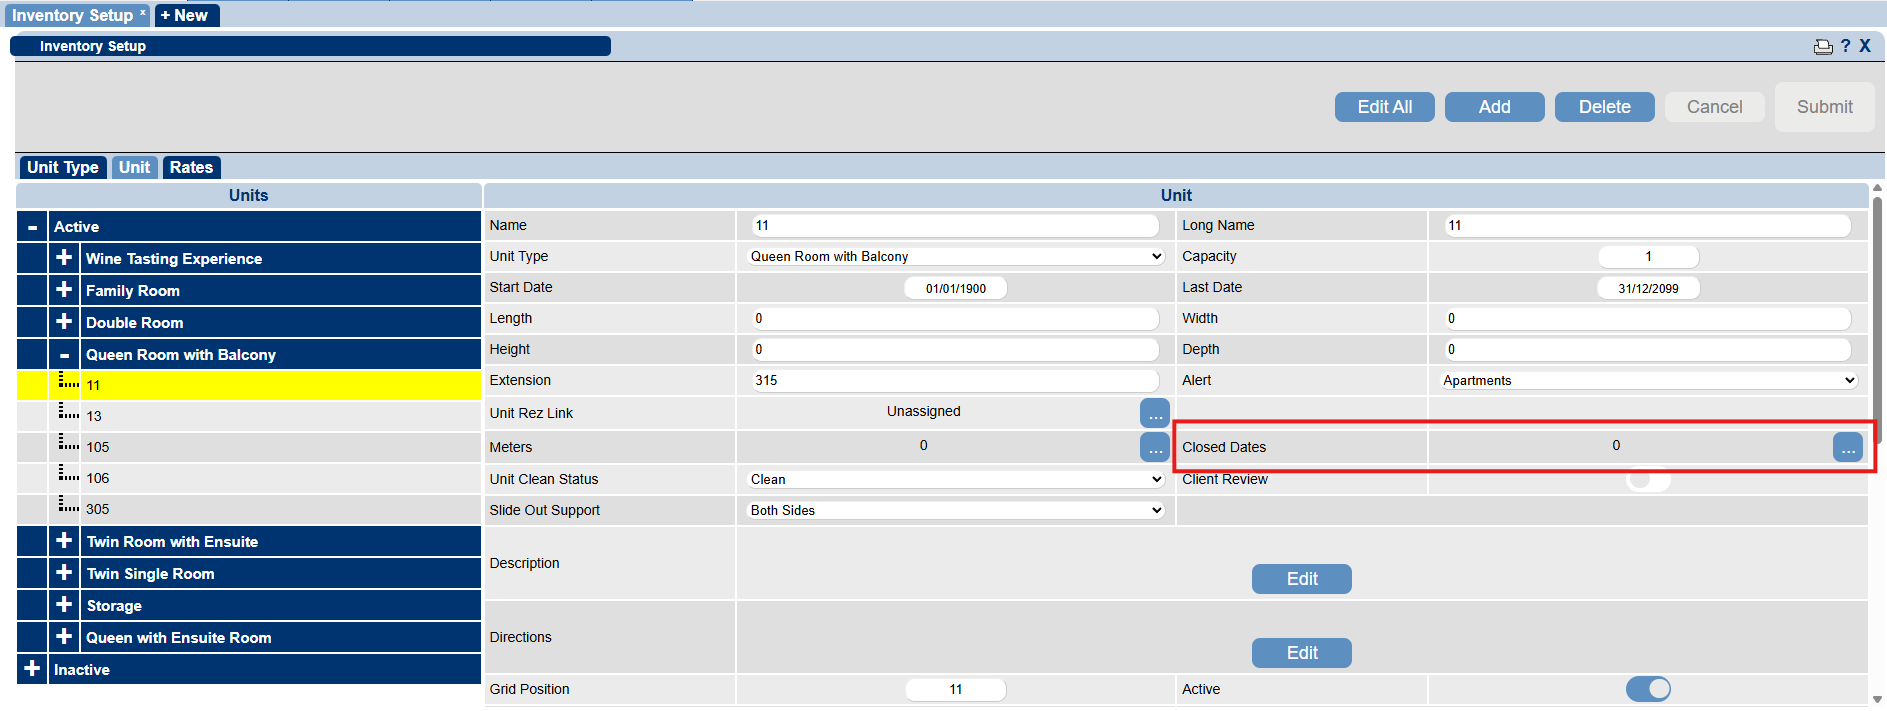
Setting up Closed Dates:
- Choose specific days within a date range or all days within the date range to apply as closed.
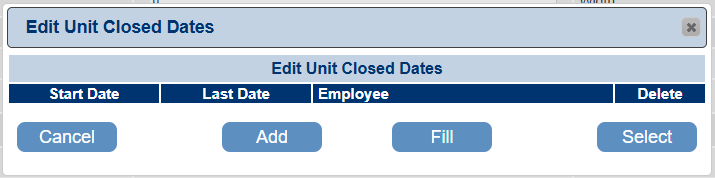
Closing for a whole date range:
- Click Add.
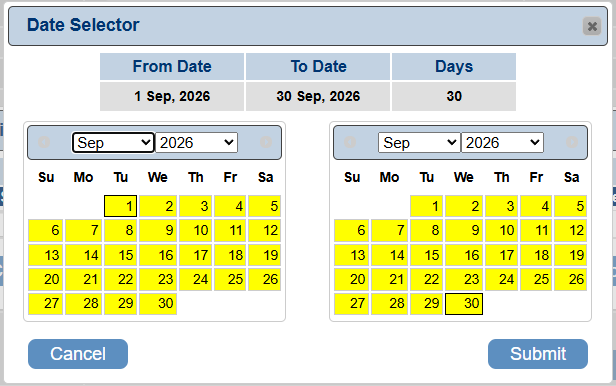
- Click on the Start date on the calendar to select the 1st closed date.
- Click on the Last date on the calendar to select the last closed date.
- Click Submit.
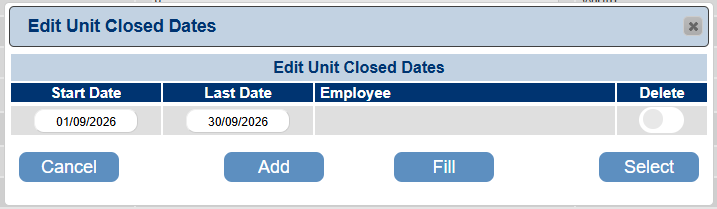
The dates will display.
If multiple date ranges need to be added, click Add and repeat the process.
- Click Select.
- Click the Submit button to finalize.
Closing particular days of the week for a date range:
- Click Fill button.
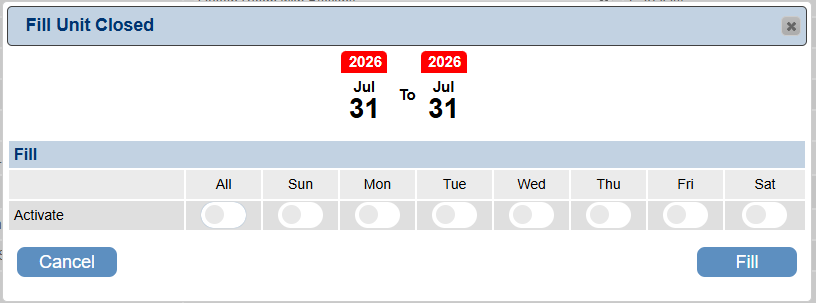
- Click on the Start date on the calendar to select the 1st closed date.
- Click on the Last date on the calendar to select the last closed date.
- Click on the sliders for the days of the week to be closed.
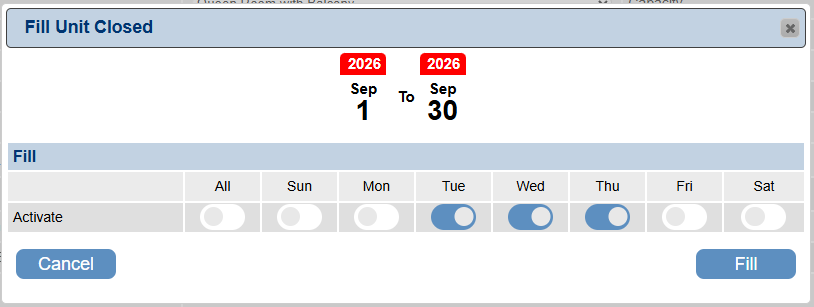
- Click Fill.
- The dates will display.
If multiple date ranges need to be added, click Add and repeat the process.
- Click Select.
- Click the Submit button to finalize.
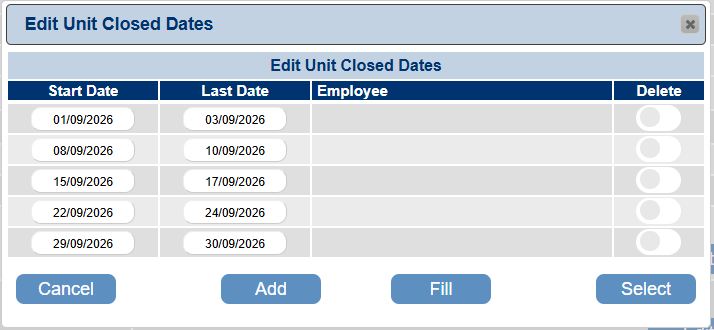
NOTE: The employee name will be logged within the Employee column.
Click on the Delete slider to delete a Closed Date period.
Availability Grid
- Once the Closed Dates are set, the Availability Grid will display a "Unit Closed" message on those dates.